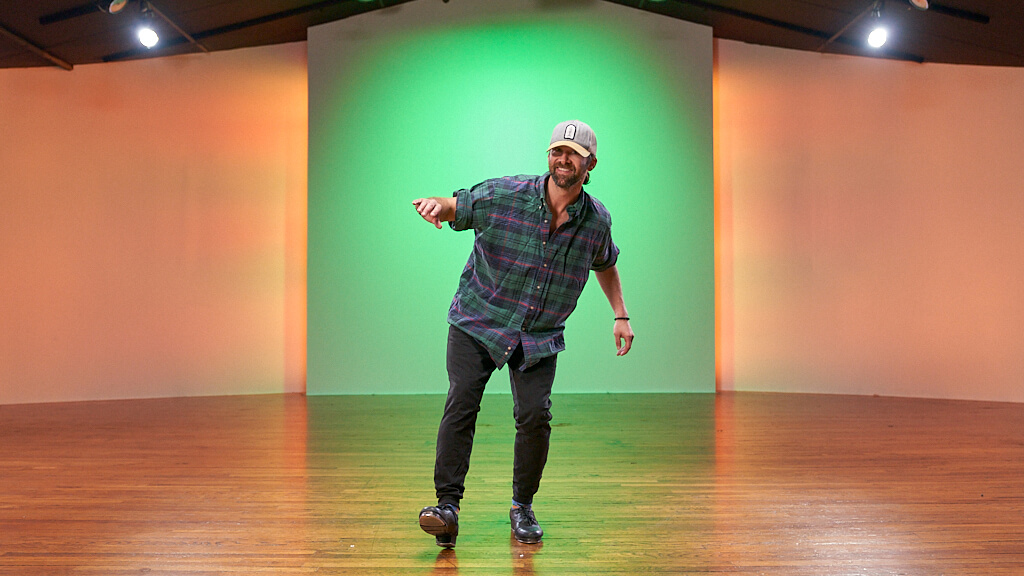
Toe heel, toe-heel, heel-toe, dig, step stomp. Heel-toe, heel-toe, dig-ah dig-ah drop. Got it?
Listening to a tap teacher can sometimes sound like listening to another language. Listening to a full room of dancers tapping can be even more disorienting, because of how loud a tap routine is! Thankfully, tap dance steps are named quite practically. When you hear a teacher yell out “dig step stomp,” they are telling you what to do, how to do it, and when to do it.
Seem tricky? It can be! The prospect of wearing a loud musical instrument on each foot can be daunting at first. But the tap world is full of common drills for beginners to easily “dig” their way in. We’ve compiled some of the best tap drills for the absolute beginner through to the intermediate dancer looking to brush up on their tap technique.
For The True Beginner:
Before you jump right into these drills, make sure your body and space are prepped.
If you’re doing these drills at home in tap shoes, make sure you prepare your space and dance on a surface that can handle some scuffs. You can practice on carpet to learn the steps, but the essence of tap lives in the scuffing of a tap on a hard floor, so try to find a dance studio or hard floor to practice on eventually.
Tap is not as full-out a dance style as ballet or jazz, but it still requires a degree of strength and physicality. Warm up your torso, hips, and abs, so you’ll be more grounded and have more control of your feet. Warming up your ankles through massage or ankle rolls will increase circulation to your feet.
Before you start, acquaint yourself with some of the most basic moves. Try stepping normally then stomping and notice the difference in sound your feet make. It can be really helpful to explore the sounds your feet can make before you start your drills.
Decide What Style You Want to Try
The classic media portrayal of tap dancing can make it seem like it’s an upright jazzy dance that looks best with a cane and a top hat. That’s Broadway-style tap, and it’s definitely not the only way to tap dance. Tap has multiple roots in African movement and dances like Irish step dancing. The tap dance that is freer in posture and more syncopated in nature is nowadays called Rhythm tap.
Interested in the spectacle of Broadway-style tap dancing? Try these drills more upright, put your hands on your hips, and work on keeping time with your music. Interested in the freedom of Rhythm tap dancing? Try these drills with a looser form, and see if you can get lost in the sounds and the feeling of your taps on the floor!
Drill 1: Cramp Rolls

In tap, a toe means touching the ball of your foot to the floor so that the top tap (the shoe’s metal plates) makes contact with the ground. It is often followed by a heel, which is when you drop only the heel to a full flat-footed position.
In a cramp roll, you step onto one toe then the other first, and then you drop your heels in succession (toe, toe, heel, heel). You can play with the speed, going from really slow, to as fast as you can while still distinguishing between the steps. You can also play with a rhythm, spacing out the steps with syncopated timing instead of being even. Try 8 cramp rolls starting with the left toe, and 8 cramp rolls starting with the right toe.
Mastered the cramp roll already? Try switching it up with alternating toe and heel (Left Toe, Right Toe, Right Heel, Left Heel), or a backward cramp roll (Heel, Heel, Toe, Toe).
Drill 2: Dig Toe-Drop, Toe Heel-Drop

A dig is when you “dig” your heel into the floor, most often from a raised position. A heel-drop is when you “drop” your heel to meet your toe that is already touching the floor.
Try 8 of these on each side. Make sure to dig and drop on one foot then the other, or else you are doing more of a backward cramp roll! Since the feet are so central in tap, the moves can get really specific. Just one change in order or weight placement can cause a completely different sound and make it a completely different dance move!
After you’ve done 8 on each side, you can try them double-time! If you’re ready for more of a challenge, Mike Keefe’s tap course will take you through a bunch of ways you can vary this basic step!
Drill 3: Paradiddles

Funky name, right? Like many tap steps, this name has a relationship to the sound of the tap when this step is performed. Par-ah-did-dle: four syllables, four steps.
The four parts to a paradiddle are Dig, spank, toe, heel. You want to dig your foot a little in front of you this time so that when you “spank” your foot backward, you can toe-heel underneath yourself in a neutral center.
New vocabulary alert! A spank is when you tap the toe-tap of your shoe as you bend your knee, bringing the foot closer to your body. To do this, your foot has to start further from your body, and you have to point or extend through your ankle a little to create the rebounding sound of the tap hitting the floor as you bring it in.
Drill 4: Shuffles

One of the most iconic steps in tap, a shuffle is when you combine a spank with a brush.
A brush has the same idea as a spank, but it goes from in to out. So a brush is when you tap the floor bringing your knee from bent to straight and ending with your foot further away from your body.
In a shuffle, your weight stays on your supporting leg. This is different from a flap. In a flap, you brush and then quickly drop your toe to end with some of your weight transferred to that foot.
For a shuffle, you want to work on the balance between having an ankle that is loose enough to brush and spank quickly but strong enough to control your sound and direction. A shuffle is by far one of the best tap moves to increase strength and mobility, so let’s try 16 on each side.
Once you’ve mastered shuffles to the front, try them to the side, and then to the back. You notice you’ll have to twist your hips a little at the back, and it ends up being a bit more diagonal than you want in exercises like jazz or ballet tendus. No worries! Tap is a different style, and the most important part is the relationship of your foot to the floor.
Drill 5: Rhythm Turns

You need to have a heel-drop, heel-drop, toe-drop, toe-drop to complete a successful rhythm turn. You can start your rhythm turn with a shuffle or a cramp roll, and then use the transfer of your own weight to bring you around.
Like any dance, words only do so much, its meant to be danced afterall! If you need an example you can watch Mike Keefe in his CLI Studios class as he walks through through this essential tap step. A big part of a rhythm turn is the rhythm. Seem obvious? It may be, but part of the trickiness of this step is using the momentum of the turn to your advantage, but not letting it take over so that you’re still in control. Give it a try!
Practice Makes Perfect!
And, that’s it! Those are all the drills you need to master tap in no time.
Just kidding! Tap, like any dance style, can take years to master, and even then, there is always more to learn. There are more tap steps and drills than we can name, but these are a great start for the beginner tap dancer. There is freedom and full-body excitement in creating music with your feet, and most tap drills involve a sense of rhythm that can sound like music when you get it right! What’s not to love?
The more advanced you get, the more you can complicate these basic drills. It’s common to have a “double” or “triple” version of each step, like a double shuffle, or a triple cramp roll!
Now you’re ready to get tapping! Try these drills with Mike Keefe as he walks through each skill online at CLI Studios!